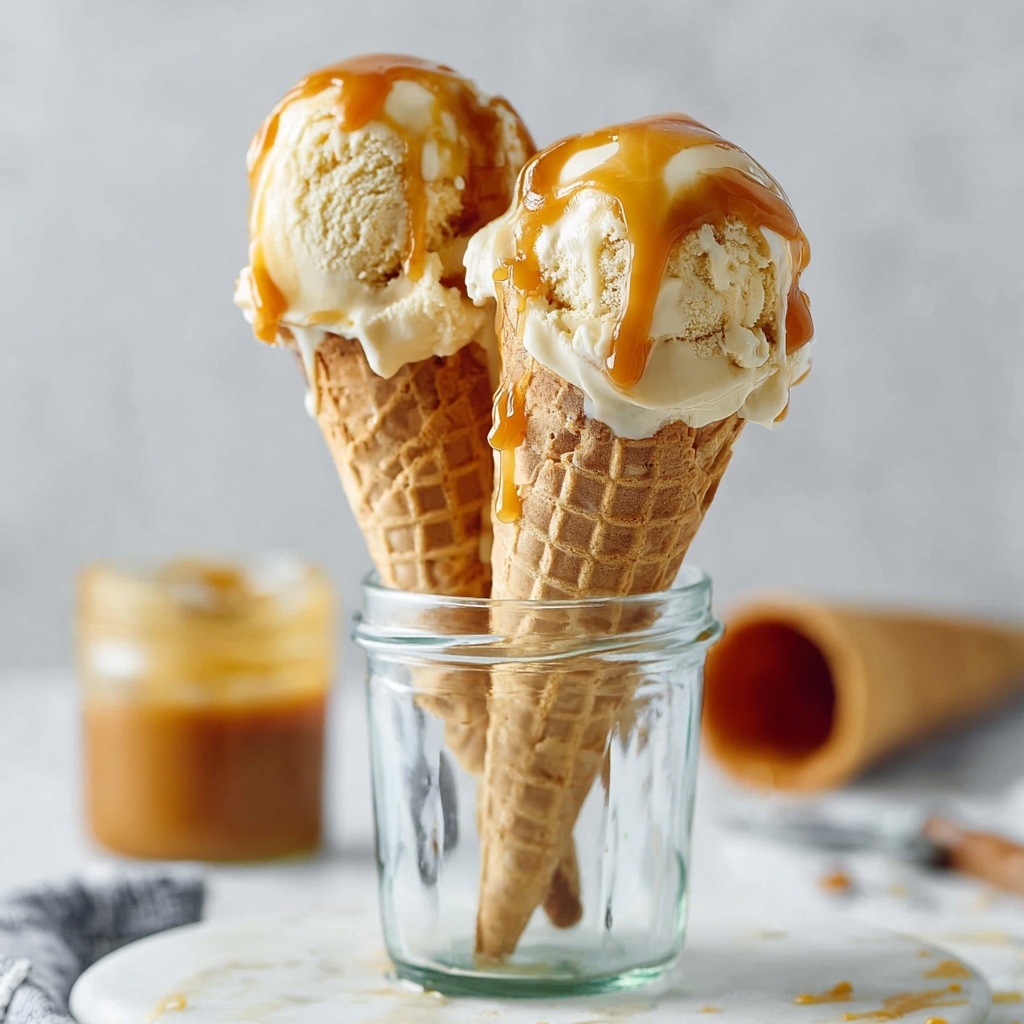
If you have a sweet tooth but want to keep things plant-based, this Vegan Caramel Ice Cream (No-Churn) Recipe is going to become your new best friend. Rich, creamy, and bursting with luscious vegan caramel flavor, this ice cream boasts the perfect balance of silky coconut whipping cream and decadent caramel sauce — all without the fuss of an ice cream maker. Plus, it’s entirely no-churn, making it an incredibly simple yet indulgent treat that anyone can whip up at home with minimal ingredients and time.
Ingredients You’ll Need
This recipe calls for just a handful of ingredients that are simple but essential to achieving that dreamy texture and luscious caramel taste. Each one plays a crucial role: the coconut whipping cream brings incredible creaminess, the sweetened condensed coconut milk adds that perfect sweetness and body, while the vegan caramel sauce delivers the star flavor that ties it all together.
- 400 g coconut whipping cream: Ensure it’s well refrigerated overnight so it whips up beautifully and gives your ice cream that rich, fluffy texture.
- 100 g sweetened condensed coconut milk: Adds natural sweetness and thickens the base for creamy consistency; look for a vegan-friendly brand.
- 200 g vegan caramel sauce: The heart of the recipe, this sauce provides the signature caramel flavor; you can add extra for swirling or topping.
How to Make Vegan Caramel Ice Cream (No-Churn) Recipe
Step 1: Whip the Coconut Cream
Start by placing the cold coconut whipping cream into a large bowl. Using an electric whisk, beat it for a couple of minutes until it becomes light and creamy. This step sets the stage for a silky, smooth texture, so don’t rush it. Once whipped, add the sweetened condensed coconut milk and whisk for another minute to blend everything evenly. This mixture is the creamy canvas for your caramel masterpiece.
Step 2: Incorporate the Caramel Sauce
Add the vegan caramel sauce in 2-3 increments, whisking after each addition. This approach helps to fully integrate the rich caramel flavor without deflating your whipped base. Then, give everything a good whisk to ensure the ingredients come together into a harmonious, luscious mixture. For a marbled effect, gently fold in a little extra caramel using a spatula to create tempting swirls.
Step 3: Freeze to Set
Transfer the ice cream mixture to a loaf pan or any airtight container. Cover it tightly with a lid or plastic wrap to prevent ice crystals from forming. Pop it into the freezer and let it chill for at least 4 hours, or until fully set. This no-churn freezing method makes it effortless to enjoy rich, homemade vegan ice cream anytime without special equipment.
Step 4: Prepare to Serve
About 15 minutes before you’re ready to dig in, take the ice cream out of the freezer to soften slightly. This little waiting time makes scooping much easier and enhances the creamy mouthfeel. Serve it with a drizzle of extra vegan caramel sauce on top for that eye-catching, gooey finish.
How to Serve Vegan Caramel Ice Cream (No-Churn) Recipe
Garnishes
Sprinkle some flaky sea salt on top to elevate the caramel’s flavor and add a delightful contrast. Crushed toasted pecans or walnuts make an excellent crunchy partner, while a few fresh berries bring a burst of freshness and color. These simple garnishes turn a humble scoop into an irresistible dessert experience.
Side Dishes
This Vegan Caramel Ice Cream (No-Churn) Recipe pairs wonderfully with warm apple crisps or a decadent vegan brownie. The contrast of hot and cold creates a satisfying dynamic. You can also serve it alongside some sliced bananas or drizzle with a bit of melted dark chocolate for a genuinely indulgent treat that guests will rave about.
Creative Ways to Present
For a fun twist, try serving the ice cream in hollowed-out coconut shells or edible waffle cones. You can also layer it with vegan caramel sauce and crushed cookies in clear glasses to create a stunning parfait. Presentation adds to the joy of this dessert, turning it into a feast for the eyes as well as the taste buds.
Make Ahead and Storage
Storing Leftovers
Keep any leftover ice cream stored in an airtight container to preserve its texture and flavor. Make sure the container is tightly sealed to prevent freezer burn. Stored properly, it should keep well for up to a week, letting you enjoy this treat for days to come without losing its charm.
Freezing
Freezing this ice cream is straightforward due to its no-churn nature. Just place the finished mixture in a well-sealed container and pop it in the freezer. Because it doesn’t rely on an ice cream maker’s churning, the texture might be slightly firmer but still delightfully creamy when served after thawing a little.
Reheating
Unlike typical reheating, with ice cream you only want to soften it a bit before serving. Remove it from the freezer about 15 minutes ahead of time to let it thaw slightly at room temperature—this makes scooping easier without losing that luscious texture or flavor intensity.
FAQs
Can I use regular coconut milk instead of coconut whipping cream?
Regular coconut milk won’t whip up the same way as coconut whipping cream because it lacks the necessary fat content, so it’s best to use the specifically formulated coconut whipping cream for that fluffy texture.
Is this recipe suitable for people with nut allergies?
Yes, the main ingredients are free from nuts, but always check the labels of your vegan caramel sauce and condensed coconut milk to ensure they’re processed in nut-free facilities if allergies are a concern.
Can I substitute the vegan caramel sauce with homemade caramel?
Absolutely! Making your own vegan caramel sauce with coconut sugar and coconut milk can be a fun alternative and allows you to customize the sweetness and flavor intensity perfectly.
How long does it take for the ice cream to fully set?
Plan for a minimum of 4 hours in the freezer; however, letting it freeze overnight often leads to an ideal scoopable texture.
Can I add mix-ins to the ice cream base?
Definitely! Chocolate chips, crushed cookies, or nuts can be folded in just before freezing to add delightful texture and extra flavor surprises to your Vegan Caramel Ice Cream (No-Churn) Recipe.
Final Thoughts
This Vegan Caramel Ice Cream (No-Churn) Recipe is a total winner when it comes to combining ease and decadence. It’s perfect for anyone craving a rich, creamy dessert without the hassle of traditional ice cream making. Give it a try and treat yourself to a scoop (or three!) of smooth, luscious caramel bliss that’s entirely plant-based and irresistibly delicious.
Print
Vegan Caramel Ice Cream (No-Churn) Recipe
- Prep Time: 30 minutes
- Cook Time: 0 minutes
- Total Time: 4 hours 30 minutes
- Yield: 8 servings
- Category: Dessert
- Method: No-Cook
- Cuisine: Vegan
- Diet: Vegan
Description
This Vegan Caramel Ice Cream is a creamy, no-churn delight made with coconut whipping cream, sweetened condensed coconut milk, and luscious vegan caramel sauce. Perfect for a dairy-free treat, it requires minimal effort and no ice cream maker. Simply whip the ingredients, freeze for a few hours, and enjoy a smooth, rich vegan dessert with the irresistible flavor of caramel.
Ingredients
Ice Cream Base
- 400 g coconut whipping cream (refrigerated overnight)
- 100 g sweetened condensed coconut milk
- 200 g vegan caramel sauce (plus extra for serving and swirling)
Instructions
- Whip the Coconut Cream: Add the cold coconut whipping cream to a large bowl and use an electric whisk to beat it for a couple of minutes until it becomes creamy and slightly fluffy.
- Incorporate the Condensed Coconut Milk: Add the sweetened condensed coconut milk to the whipped cream and whisk for another minute to combine smoothly.
- Add the Caramel Sauce: Gradually add the 200 g of vegan caramel sauce in 2-3 increments, whisking well after each addition to fully blend it into the mixture. For an extra caramel swirl effect, gently fold in some caramel sauce using a spatula now if desired.
- Prepare for Freezing: Transfer the ice cream mixture into a loaf pan or airtight container, then cover with a lid, plastic wrap, and optionally an additional layer of parchment paper to prevent freezer burn and air exposure.
- Freeze Until Set: Place the container in the freezer and freeze for at least 4 hours, or until the ice cream is completely set and firm.
- Serve: Remove the ice cream from the freezer about 15 minutes before serving to allow it to soften slightly for easier scooping. Serve topped with extra vegan caramel sauce for added indulgence.
Notes
- Refrigerating the coconut whipping cream overnight helps achieve the right texture for whipping.
- Swirling extra caramel sauce into the ice cream after mixing adds beautiful caramel ribbons and enhances the flavor.
- Covering with parchment paper before freezing helps prevent ice crystals forming on the ice cream surface.
- No special equipment like ice cream makers is required for this no-churn recipe.