If you are looking for a delightful twist on a classic Italian dessert, this Cannoli Cookie Cups Recipe is sure to win your heart and taste buds. Imagine rich, gooey chocolate chip cookie cups hugging a creamy, dreamy blend of mascarpone and ricotta filling, lightly sweetened and whipped to perfection. Each bite offers a perfect harmony of crunchy, creamy, and sweet that makes this dessert irresistible for any occasion. Whether you’re serving them at a party or just craving a homemade treat, these cookie cups put a fresh, fun spin on traditional cannoli that everyone will adore.
Ingredients You’ll Need
The beauty of this recipe lies in its simplicity. Using common ingredients that you probably already have on hand, each component plays a vital role in building the layers of flavor and texture that make these cookie cups unforgettable.
- Chocolate chip cookie dough: Provides the warm, buttery base with pockets of melty chocolate chips for perfect sweetness and chew.
- Heavy whipping cream (cold): Whipped to fluffy peaks, it lightens the creamy filling and adds a luscious texture.
- Mascarpone cheese: This smooth, Italian cheese lends richness and a slight tang that balances the sweetness wonderfully.
- Powdered sugar: Adds delicate sweetness without graininess, helping create a smooth filling.
- Ricotta cheese: Offers a creamy, mildly grainy texture that complements mascarpone and gives classic cannoli flavor.
- Vanilla extract: Infuses lovely warmth and depth, rounding out the final taste.
How to Make Cannoli Cookie Cups Recipe
Step 1: Prepare the Cookie Cups
Start by preheating your oven to 350ºF and greasing your mini muffin pan to keep the cookies from sticking. Drop portions of chocolate chip cookie dough into each muffin cup—they will bake into perfectly sized little cups. Bake for 15 to 18 minutes until the edges are golden brown, then gently press down the centers with a tart tamper while still warm to form the cavity for the filling. Allow them to cool completely on a wire rack before moving to the next step.
Step 2: Whip the Cream
In a medium bowl, take that cold heavy whipping cream and beat it with an electric mixer until stiff peaks form. This will make the filling light and airy, providing a delicate balance to the richness of the cheeses and cookie base. Setting this aside for now will keep your filling fluffy and fresh.
Step 3: Make the Cannoli Filling
In a separate bowl, beat the mascarpone cheese with powdered sugar until velvety smooth and sweet. Then, mix in the ricotta cheese and vanilla extract on low speed just until everything combines harmoniously. Finally, gently fold the whipped cream into this mixture, taking care to maintain that wonderful fluffiness that makes each bite melt in your mouth.
Step 4: Assemble the Cookie Cups
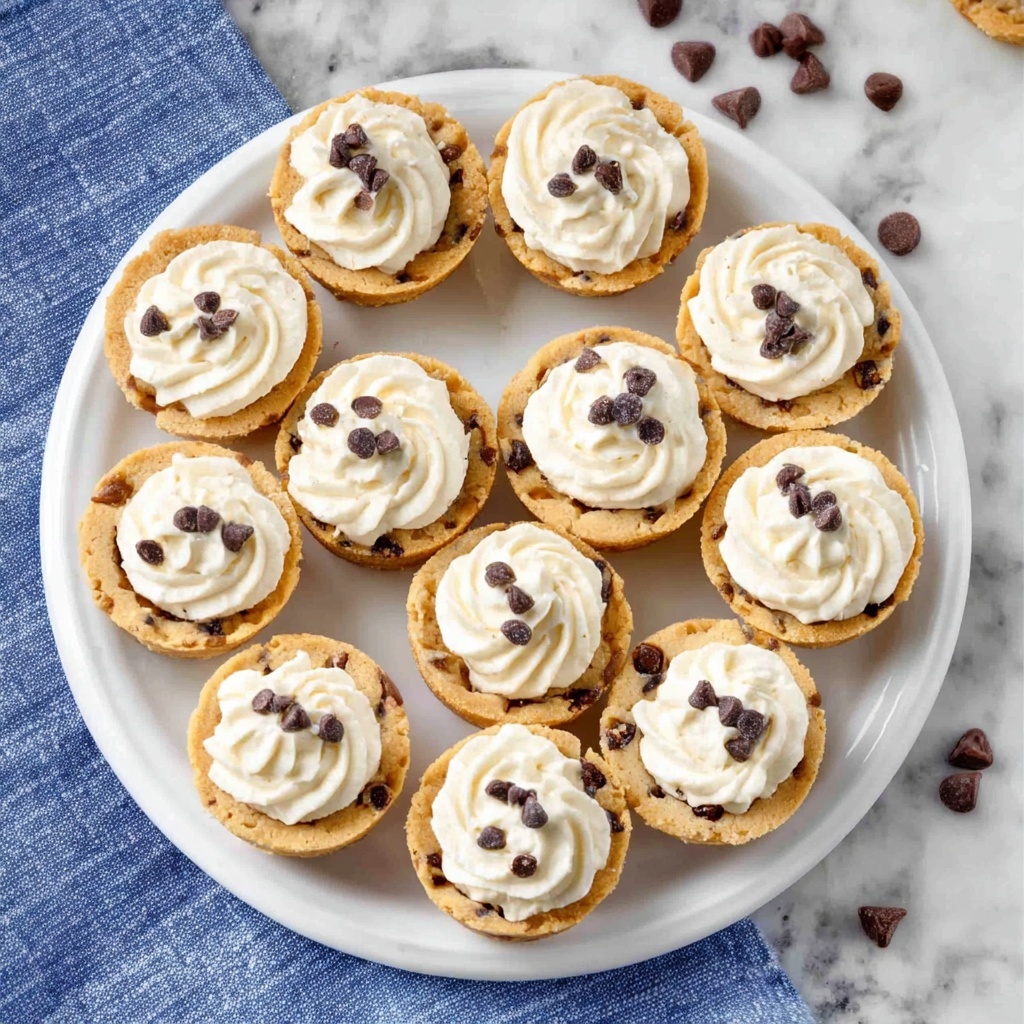
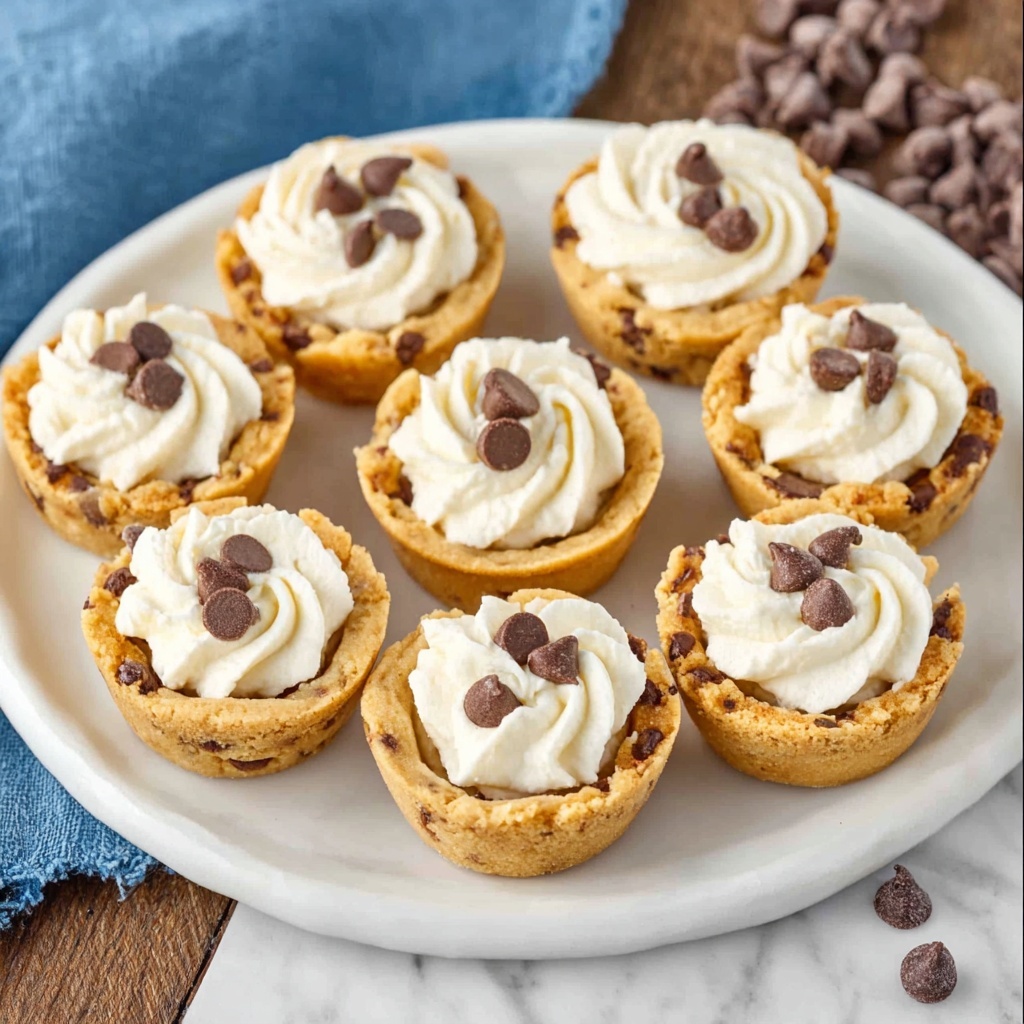
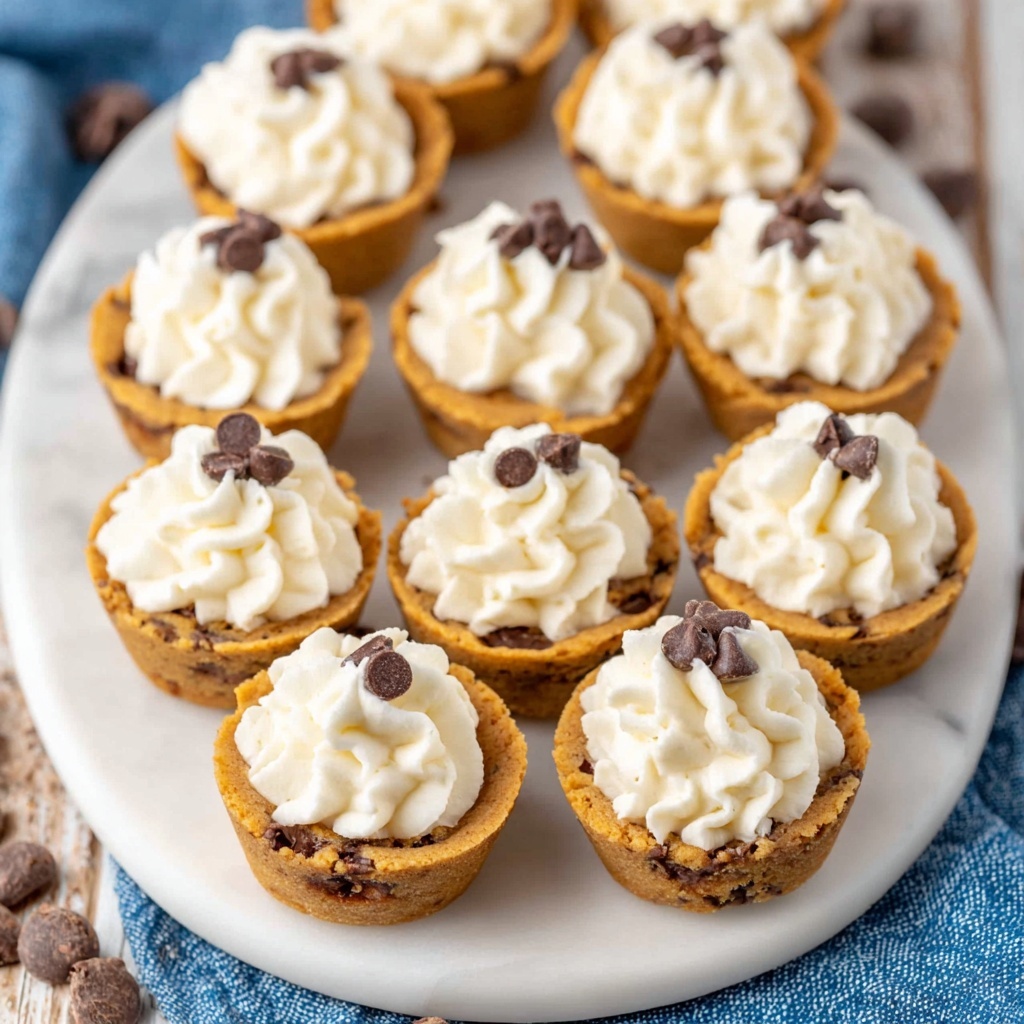
Transfer the creamy filling into a pastry bag for an easy, mess-free experience. Pipe the luscious cannoli cream into the cooled cookie shells, filling each cup generously. This is where the magic really comes together—the crispy, chewy cups paired with the creamy, dreamy filling create something truly special.
Step 5: Add the Finishing Touches and Chill
Top your filled cookie cups with mini chocolate chips or chopped pistachios for extra texture, color, and crunch. Then place them on a baking tray and refrigerate until you’re ready to serve, allowing the flavors to meld and the filling to set just right.
How to Serve Cannoli Cookie Cups Recipe
Garnishes
The final presentation makes all the difference. Sprinkle your cookie cups with vibrant chopped pistachios for a pop of color and nutty flavor, or scatter mini chocolate chips for a classic touch. A light dusting of powdered sugar just before serving adds a lovely, bakery-style finish that invites people to dive in.
Side Dishes
While these cookie cups stand out as a dessert on their own, pairing them with fresh berries or a simple espresso enhances their richness without competing with their flavor. A scoop of gelato or a dollop of whipped cream also complements these treats beautifully for a more indulgent experience.
Creative Ways to Present
For a festive occasion, arrange the Cannoli Cookie Cups Recipe on a decorative platter lined with parchment paper or edible flower petals. You can also serve them in mini cupcake liners for easy handling. For an interactive dessert bar, offer a variety of toppings like crushed nuts, sprinkles, or chocolate drizzle so guests can customize their cups.
Make Ahead and Storage
Storing Leftovers
Place any leftover Cannoli Cookie Cups in an airtight container and refrigerate. They will stay fresh and delicious for up to 3 days. Keep the cookie cups filled with cream chilled to maintain the perfect creamy texture.
Freezing
It’s best to freeze the cookie cups before filling. Bake the cookie cups and let them cool completely, then freeze them in a sealed container or zip-top bag for up to 1 month. When ready to serve, thaw at room temperature, fill with the cannoli cream, and refrigerate before serving to maintain freshness.
Reheating
Because of the delicate filling, reheating filled Cannoli Cookie Cups is not recommended. If you prefer warm cookie cups, gently warm the thawed or freshly baked cookie bases in the oven for a few minutes before filling them with cold cream just prior to serving.
FAQs
Can I use store-bought cookie dough for this recipe?
Absolutely! Using store-bought chocolate chip cookie dough is a fantastic time-saver and works perfectly to create the cookie cups, giving you convenience without sacrificing flavor.
What can I substitute for mascarpone cheese?
If mascarpone cheese is unavailable, you can substitute it with cream cheese mixed with a little heavy cream for a similar creamy texture, though it will have a slightly tangier flavor.
Is it necessary to chill the cookie cups after filling?
Yes, chilling the filled cookie cups helps the cannoli cream set firmly and ensures the flavors develop beautifully, making each bite more refreshing and satisfying.
Can I make the filling ahead of time?
You can prepare the cannoli filling up to a day in advance and keep it refrigerated in an airtight container. Give it a gentle stir before piping into the cookie cups for best texture.
How do I prevent the cookie cups from getting soggy?
Pressing down the centers while the cookies are warm creates a sturdy shell, and refrigerating them after filling ensures the moisture doesn’t soften the cookies too quickly. Serving them soon after filling helps too!
Final Thoughts
Trying this Cannoli Cookie Cups Recipe will bring a fresh and joyous new favorite to your dessert repertoire. It’s easy, fun, and downright delicious—perfect for impressing guests or treating yourself. So don’t wait; gather your ingredients, follow the steps, and create these delightful little cups filled with creamy goodness. Your sweet tooth will thank you!
Print
Cannoli Cookie Cups Recipe
- Prep Time: 10 minutes
- Cook Time: 15-18 minutes
- Total Time: 28 minutes
- Yield: 24 cookie cups
- Category: Dessert
- Method: Baking
- Cuisine: Italian-American
Description
Delightful Cannoli Cookie Cups combine soft chocolate chip cookie shells filled with a creamy mascarpone and ricotta filling, perfect for an easy yet indulgent dessert that captures the classic flavors of traditional cannoli in a fun, bite-sized form.
Ingredients
Cookie Cups
- 1 (16-oz) package chocolate chip cookie dough
- Cooking spray, for greasing mini muffin pan
Cannoli Filling
- 6 Tbsp heavy whipping cream, cold
- 4 oz mascarpone cheese
- ¼ cup powdered sugar
- ½ cup ricotta cheese
- 1 tsp vanilla extract
- Optional toppings: mini chocolate chips or chopped pistachios
Instructions
- Preheat and prepare pan: Preheat the oven to 350ºF (175ºC). Lightly spray a mini muffin pan with cooking spray to prevent sticking of the cookie dough.
- Bake cookie cups: Divide the chocolate chip cookie dough evenly into the prepared mini muffin pan cups. Bake in preheated oven for 15 to 18 minutes or until golden brown. Remove from oven, and while still warm, press down the center of each cookie with a tart tamper to create a cup shape. Then transfer the cookie cups onto a wire rack to cool completely.
- Whip cream: In a medium bowl, beat the cold heavy whipping cream using an electric mixer until stiff peaks form, indicating the cream holds its shape well.
- Prepare filling: In a separate large bowl, beat the mascarpone cheese and powdered sugar until smooth with an electric mixer. Then gently fold in the ricotta cheese and vanilla extract, mixing on low just until combined. Finally, carefully fold the whipped cream into the mascarpone mixture, maintaining the creamy, airy texture.
- Fill cookie cups: Spoon or pipe the ricotta and mascarpone cannoli filling into a pastry bag. Fill each cooled cookie cup generously with the cream mixture.
- Add toppings and chill: Sprinkle the filled cookie cups with mini chocolate chips or chopped pistachios if desired. Place the assembled cannoli cookie cups on a baking tray and refrigerate until ready to serve, allowing the filling to set for best flavor and texture.
Notes
- Use room temperature ingredients for the filling except for the cold whipping cream which whips best chilled.
- The tart tamper or a similar tool can be substituted with the back of a large spoon or a small glass to shape the cookie centers.
- These cookie cups are best served the same day but can be refrigerated for up to 24 hours.
- For a different twist, try adding citrus zest (like orange or lemon) to the filling.
- If you prefer a dairy-free option, substitute mascarpone and ricotta with coconut cream and use a dairy-free powdered sugar.
