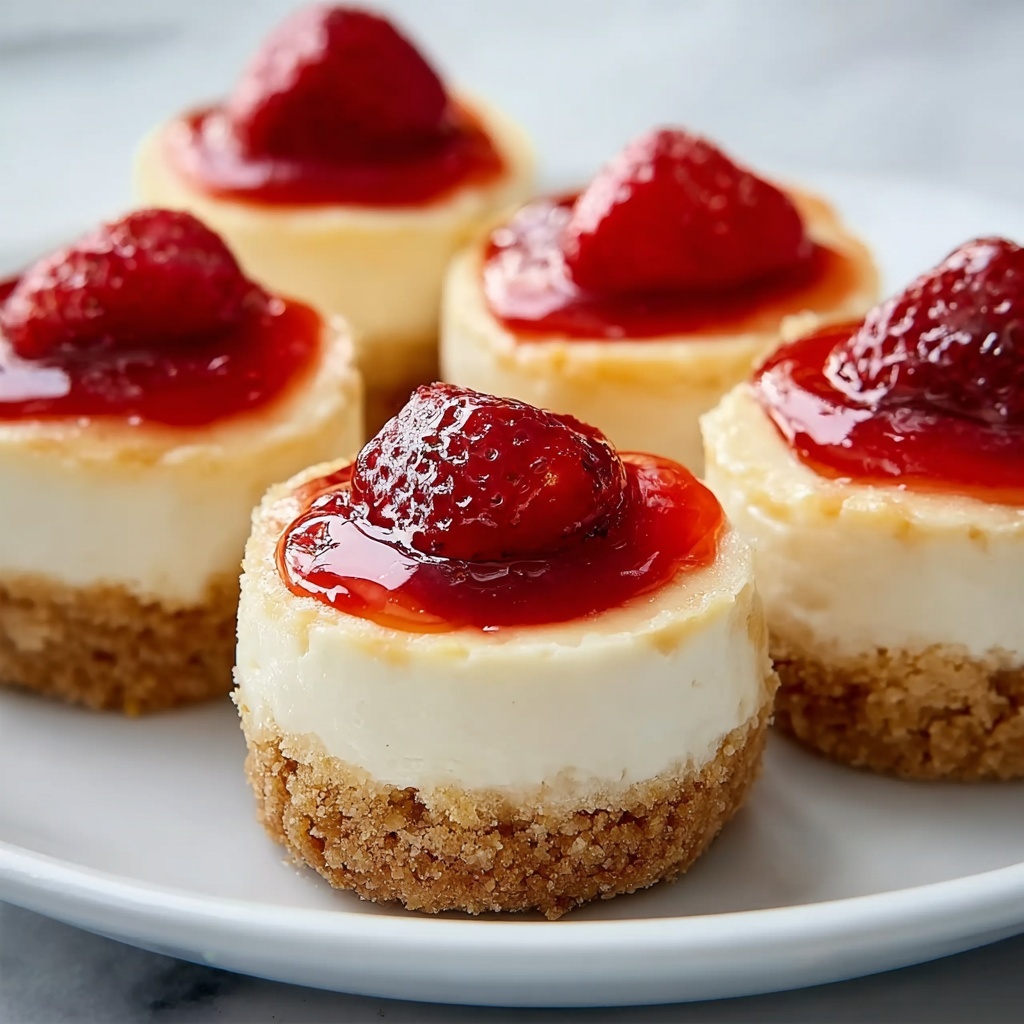
If you’re looking for a charming, crowd-pleasing dessert that’s both elegant and easy to make, this Mini Cheesecakes with Vanilla Wafer Crust Recipe is an absolute winner. Picture bite-sized cheesecakes with a buttery, crunchy vanilla wafer crust that perfectly complements a rich, creamy filling — it’s comfort and indulgence all in one small package. These little treats are perfect for parties, special occasions, or simply a delightful everyday indulgence that brings smiles with every bite.
Ingredients You’ll Need
Gathering simple, straightforward ingredients is what makes this Mini Cheesecakes with Vanilla Wafer Crust Recipe so approachable. Each one plays an essential role in creating the perfect balance of flavor, texture, and color that makes these mini cheesecakes shine.
- Vanilla wafer crumbs (1 ½ cups): Provide a sweet, crumbly base with delightful vanilla notes.
- Granulated sugar (2 tbsp for crust + ½ cup for filling): Adds sweetness to both the crunchy crust and creamy filling.
- Butter, melted (6 tbsp): Binds the crust crumbs together for that perfect crispness.
- Cream cheese, softened (16 oz): The star ingredient that gives the filling its luscious, creamy texture.
- Vanilla extract (1 tsp): Enhances the flavor and adds a warm aromatic touch.
- Large eggs (2): Help set the cheesecake with a rich and smooth consistency.
- Sour cream (½ cup): Adds creaminess and a slight tang to balance the sweetness.
- All-purpose flour (2 tbsp, optional): Provides extra firmness if you prefer a sturdier cheesecake.
- Fresh berries, whipped cream, or fruit compote: Perfect for topping your mini cheesecakes with a burst of color and flavor.
How to Make Mini Cheesecakes with Vanilla Wafer Crust Recipe
Step 1: Preheat and Prep
First things first, preheat your oven to 325°F (163°C). While that’s coming up to temperature, line a muffin tin with paper liners to make sure your mini cheesecakes come out easily after baking—no mess, no fuss.
Step 2: Mix and Press the Crust
In a bowl, combine your vanilla wafer crumbs and granulated sugar. Pour in the melted butter and stir everything together until the crumbs are evenly moistened. This creates that irresistible crunchy base that makes every bite a delight. Press about one tablespoon of this mixture into the bottom of each muffin liner, forming an even crust layer.
Step 3: Bake the Crust
Pop the crusts into the oven and bake for 8 to 10 minutes, or until they turn a lovely golden brown. This step ensures the crust is perfectly crisp before adding the creamy filling. Once done, remove from the oven and let the crusts cool while you prepare the filling.
Step 4: Whip Up the Cheesecake Filling
Now for the fun part: the filling. Beat the softened cream cheese in a large bowl until it’s wonderfully smooth and creamy. Add the sugar and vanilla extract, continuing to mix until fully combined. Next, add the eggs one at a time, beating well after each addition to keep things silky. Finally, stir in the sour cream and flour if you’re using it. This filling is where the magic happens—it’s rich, velvety, and just slightly tangy.
Step 5: Fill the Crusts
Using a spoon, gently spoon the cheesecake filling over the cooled crusts in your muffin tin, filling each cup nearly to the top. This sets the stage for perfectly proportioned mini cheesecakes that are as beautiful as they are tasty.
Step 6: Bake the Mini Cheesecakes
Bake the cheesecakes for 18 to 20 minutes, until the centers are just set and the tops have a light golden hue. Avoid overbaking to keep them creamy in the middle. After baking, let them cool in the pan for about 10 minutes before transferring them to a wire rack to cool completely.
Step 7: Chill to Perfection
Once at room temperature, refrigerate the mini cheesecakes for at least two hours. This chilling time is crucial—it allows them to firm up to the perfect texture, making each bite a blissfully creamy experience nestled against the crunchy crust.
Step 8: Serve and Enjoy
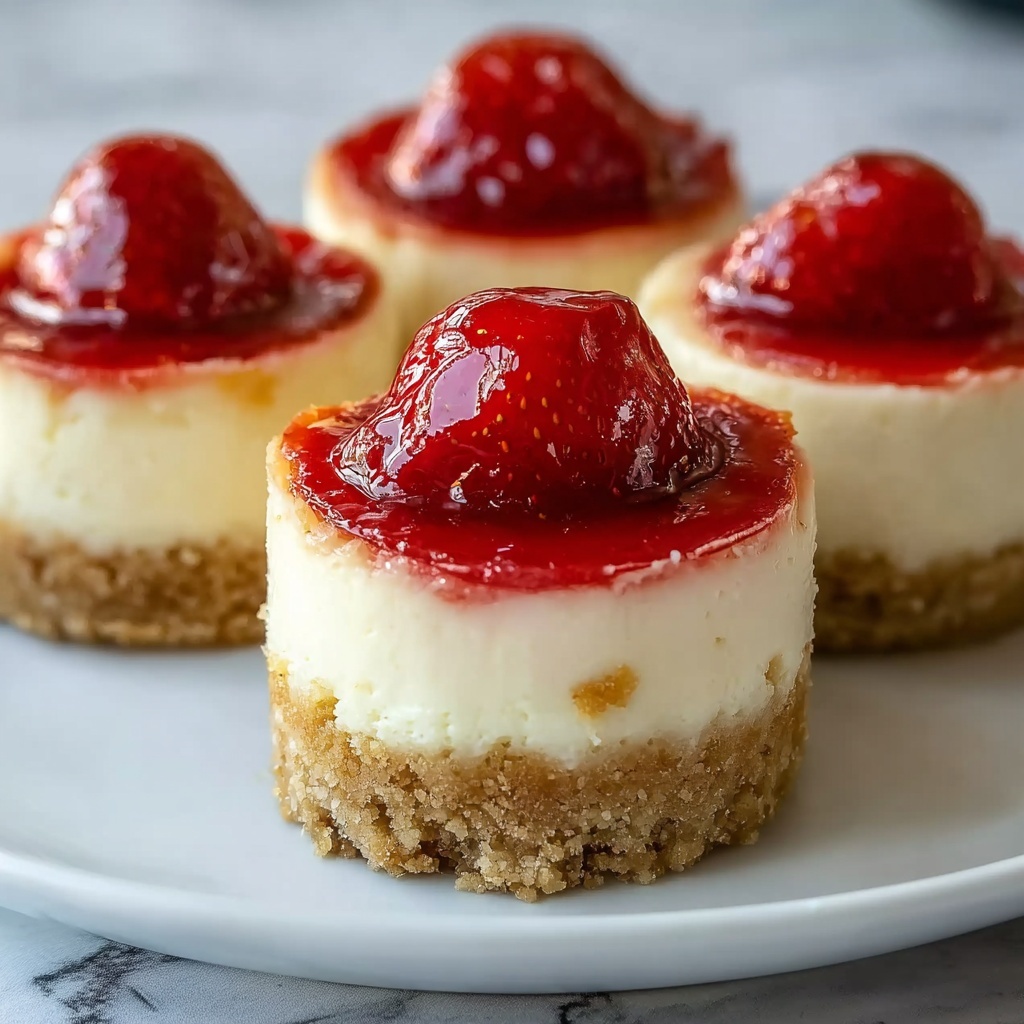
When you’re ready to indulge, top your mini cheesecakes with fresh berries, a dollop of whipped cream, or a drizzle of fruit compote. The finishing touches add freshness, color, and a complementary burst of flavor, making each serving feel like a special treat.
How to Serve Mini Cheesecakes with Vanilla Wafer Crust Recipe

Garnishes
Fresh berries like raspberries, blueberries, or sliced strawberries bring vibrant color and natural sweetness that contrasts beautifully with the creamy filling. A sprinkle of powdered sugar or a swirl of whipped cream can add an elegant touch, making these mini cheesecakes feel extra festive or indulgent.
Side Dishes
Pair your mini cheesecakes with a light, refreshing side like a citrus salad or a simple mint tea to balance the richness. The contrast of light, tangy flavors alongside the creamy texture will keep the palate refreshed and wanting more.
Creative Ways to Present
Try serving these mini cheesecakes on a tiered dessert stand for a stunning centerpiece at your next gathering. You can also place them in small clear cups topped with layered fruit compote for an elegant parfait-style presentation. Even simple clear cupcake wrappers enhance their visual appeal while keeping them easy to handle.
Make Ahead and Storage
Storing Leftovers
After enjoying your Mini Cheesecakes with Vanilla Wafer Crust Recipe, store any leftovers in an airtight container in the refrigerator. They stay fresh and flavorful for up to four days, making them a great option for preparing ahead of time or savoring later.
Freezing
If you want to keep these mini treats longer, they freeze beautifully. Place them in a single layer on a baking sheet to freeze initially, then transfer to a freezer-safe container or bag. When properly wrapped, they can last up to two months. Just thaw overnight in the fridge before serving.
Reheating
Mini cheesecakes are best enjoyed cold or at room temperature, so reheating is rarely necessary. However, if you prefer a slightly softer texture, allow them to sit out of the refrigerator for 15 to 20 minutes before serving. Avoid microwaving as it can affect the texture and cause the crust to get soggy.
FAQs
Can I use a different type of cookie for the crust?
Absolutely! While vanilla wafers provide a classic flavor and texture, crushed graham crackers, gingersnaps, or shortbread cookies can work beautifully too, each adding its own twist to the crust.
Do I have to use sour cream in the filling?
Sour cream adds a subtle tang and creamy texture, but you can substitute it with Greek yogurt or heavy cream if needed. Just keep in mind these swaps might slightly alter the flavor and consistency.
Why is the flour optional in the recipe?
The flour is included to give the cheesecakes a firmer structure, which helps if you plan to transport them or want a more cake-like bite. However, leaving it out yields a silkier, more delicate texture if that’s your preference.
Can I make these mini cheesecakes dairy-free?
With substitutions like dairy-free cream cheese, butter alternatives, and plant-based sour cream, you can create a delicious vegan or dairy-free version. Just be mindful that baking times and texture may vary slightly.
How long can I refrigerate the mini cheesecakes before serving?
For the best taste and texture, chilling them for at least two hours is recommended. They can be refrigerated for up to four days without losing their deliciousness.
Final Thoughts
There’s something truly special about these Mini Cheesecakes with Vanilla Wafer Crust Recipe — their perfect size, creamy filling, and sweet, crunchy crust make them instantly irresistible. Whether you’re sharing with loved ones, bringing them to a celebration, or just treating yourself, these little cheesecakes never fail to bring joy. Give this recipe a try and watch how it becomes your new favorite go-to dessert!
Print
Mini Cheesecakes with Vanilla Wafer Crust Recipe
- Prep Time: 15 minutes
- Cook Time: 28 minutes
- Total Time: 2 hours 43 minutes
- Yield: 12 servings
- Category: Dessert
- Method: Baking
- Cuisine: American
Description
Delight in these Mini Cheesecakes with a crunchy vanilla wafer crust, offering a perfect balance of creamy, tangy filling and sweet, buttery base. Ideal for individual servings, these cheesecakes are baked to perfection and topped with fresh berries or whipped cream, making a charming dessert for any occasion.
Ingredients
Crust
- 1 ½ cups vanilla wafer crumbs (about 20–25 wafers)
- 2 tbsp granulated sugar
- 6 tbsp butter, melted
Cheesecake Filling
- 16 oz cream cheese, softened
- ½ cup granulated sugar
- 1 tsp vanilla extract
- 2 large eggs
- ½ cup sour cream
- 2 tbsp all-purpose flour (optional, for extra firmness)
Toppings
- Fresh berries, whipped cream, or fruit compote
Instructions
- Preheat the Oven: Preheat your oven to 325°F (163°C) and line a muffin tin with paper liners to prepare for baking the mini cheesecakes.
- Prepare the Crust: In a bowl, combine the vanilla wafer crumbs and sugar. Add the melted butter and stir until the mixture is evenly moistened. Press about 1 tablespoon of this crust mixture into the bottom of each muffin tin liner to create an even crust layer.
- Bake the Crust: Place the muffin tin in the oven and bake the crust for 8-10 minutes until it turns golden brown. Remove the tin from the oven and allow the crusts to cool as you prepare the filling.
- Prepare the Cheesecake Filling: In a large mixing bowl, beat the softened cream cheese until smooth and creamy. Add the sugar and vanilla extract, beating until fully combined. Incorporate the eggs one at a time, mixing well after each addition. Finally, fold in the sour cream and flour if using, ensuring a smooth batter.
- Fill the Cups: Spoon the cheesecake filling evenly over the cooled crusts, filling each muffin liner almost to the top without overflowing.
- Bake the Cheesecakes: Return the muffin tin to the oven and bake the mini cheesecakes for 18-20 minutes until the centers are set and tops are lightly golden. Let them cool in the pan for 10 minutes before transferring to a wire rack to cool completely.
- Chill: Refrigerate the mini cheesecakes for at least 2 hours to allow them to firm up and develop the best texture.
- Serve: Garnish each mini cheesecake with fresh berries, whipped cream, or your preferred fruit compote before serving to add a fresh and vibrant finish.
Notes
- The optional flour in the filling helps add extra firmness to the cheesecakes.
- Make sure the cream cheese is fully softened to prevent lumps in the batter.
- Allow cheesecakes to chill thoroughly for best slicing and texture.
- Use paper liners for easy removal and presentation.
- Fresh toppings can be varied according to season and preference.

