
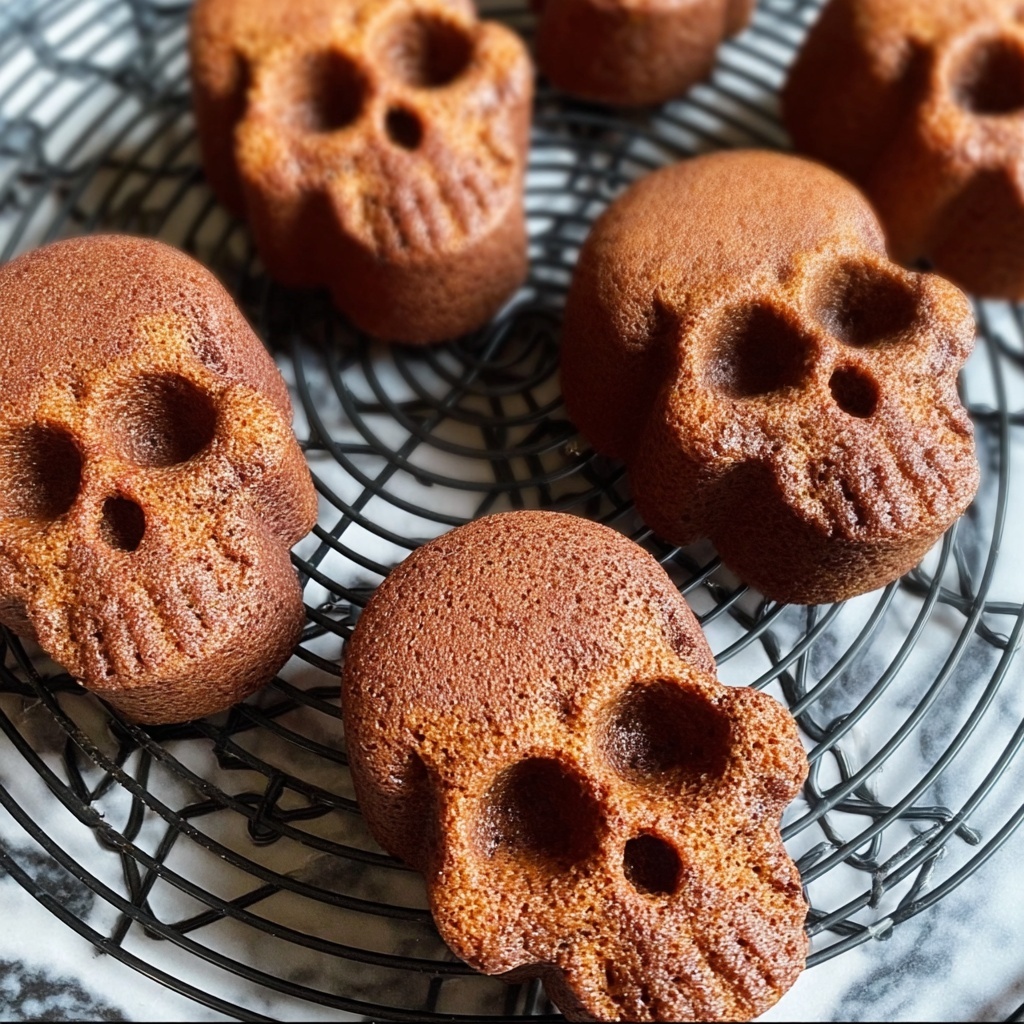
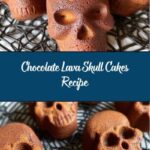
If you are a fan of rich, gooey chocolate desserts with a fun, spooky twist, then the Chocolate Lava Skull Cakes Recipe is about to become your new obsession. These adorable skull-shaped cakes not only look impressive but also deliver that luscious molten chocolate center that melts in your mouth with every bite. Imagine the excitement and delight on your guests’ faces when you present these dramatic yet delightfully easy-to-make cakes that combine the perfect balance of texture, sweetness, and chocolate indulgence.

Ingredients You’ll Need
The magic behind these Chocolate Lava Skull Cakes Recipe lies in its simple yet essential ingredients. Each component plays a vital role in creating the rich, molten center, tender crumb, and smooth surface that makes these cakes irresistible.
- Semi-sweet chocolate chips (1 cup): Use good quality chocolate for the best melt and deep cocoa flavor.
- Butter (10 Tbsp): Adds richness and ensures the cake’s tender texture and moist crumb.
- Whole eggs (3): Provide structure and help create that luscious, dense cake body.
- Egg yolks (3): Enhance the richness and add to the silky mouthfeel of the molten center.
- Powdered sugar (1½ cups): Smoothly sweetens the batter without graininess, creating a silky finish.
- All-purpose flour (½ cup): Just enough to bind the batter without overpowering the molten texture.
How to Make Chocolate Lava Skull Cakes Recipe
Step 1: Prepare Your Pan
Start by preheating your oven to 450ºF. Generously grease your skull cake pan with shortening and cooking spray, making sure you reach every little nook and cranny. This is essential so the cakes release perfectly and keep their spooky skull shape without sticking.
Step 2: Melt the Chocolate and Butter
In a small saucepan over low heat, melt the semi-sweet chocolate chips together with the butter. Stir constantly until it’s beautifully smooth and glossy. Then, remove it from the heat and let it cool slightly—this prevents cooking the eggs in your batter too soon.
Step 3: Mix the Eggs and Sugar
Whisk together the whole eggs and egg yolks in a large bowl until well combined. Then, beat in the powdered sugar until the mixture is light and slightly fluffy. Adding the chocolate mixture and flour comes next, folding everything gently but thoroughly to achieve a consistent batter that’s rich and smooth.
Step 4: Fill and Bake
Pour the batter evenly into your prepared skull pan. Because these cakes are delicate, don’t rush this step. Then bake them for about 11 to 13 minutes. You’ll know they’re ready when the edges look set but the centers still jiggle slightly—this is what guarantees that molten chocolate lava inside.
Step 5: Cool and Remove
Once out of the oven, let the cakes cool in the pan for 3 minutes. This small cooling window allows the cakes to set just enough for easy removal. Carefully turn the pan upside down onto a parchment-lined baking rack, then gently lift the pan away to reveal your perfectly shaped skull cakes.
Step 6: Time to Serve
Serve your Chocolate Lava Skull Cakes Recipe warm with your favorite ice cream or whipped cream—you’ll want all the luscious molten chocolate center oozing out with every bite. The contrast of hot cake and cold cream is pure magic!
How to Serve Chocolate Lava Skull Cakes Recipe
Garnishes
To elevate these spooky treats even further, consider garnishing with fresh raspberries or a dusting of powdered sugar. A drizzle of raspberry coulis or chocolate sauce adds a gourmet touch and complements the intense chocolate flavor beautifully.
Side Dishes
Pair the skull cakes with a scoop of creamy vanilla ice cream or a cloud of lightly sweetened whipped cream. Fresh fruit like strawberries or blackberries adds vibrant color and a tart contrast that balances the richness wonderfully.
Creative Ways to Present
For a fun Halloween party, arrange the skull cakes on a platter decorated with edible sugar “bones” or a sprinkle of crushed cookies for texture. Serving them in individual mini skull cake pans makes for a spooky surprise, and you can even top with edible glitter or colored icing for an extra pop of personality.
Make Ahead and Storage
Storing Leftovers
Since these cakes are best enjoyed warm, store any leftovers in an airtight container in the refrigerator for up to 2 days. The texture will change slightly, but reheating brings some life back to that molten center.
Freezing
You can freeze these cakes before baking by pouring the batter into the pans, covering tightly, and freezing for up to a month. When ready to bake, simply add a couple of extra minutes to the baking time and bake straight from frozen.
Reheating
To reheat, place the cakes in a microwave-safe dish and warm for 20 to 30 seconds, or until the center again turns molten. Take care not to overheat, or you’ll lose that luscious lava effect.
FAQs
Can I use dark chocolate instead of semi-sweet?
Absolutely! Dark chocolate will give your cakes a richer, more intense chocolate flavor. Just ensure it’s smooth and melts well, and adjust the sugar slightly if you prefer a less sweet dessert.
What if I don’t have a skull cake pan?
You can use standard muffin tins or small ramekins; just be aware that the skull shape won’t be there, but the taste and lava center will still be fantastic.
How do I know when the cakes are perfectly baked?
The edges should look set and slightly firm, but the center should jiggle a bit when you gently shake the pan. This ensures you get that molten chocolate center instead of a fully cooked cake.
Can I make the batter ahead of time?
It’s best to make the batter fresh just before baking for optimal texture and lava effect, but you can briefly refrigerate it if needed—just let it come to room temperature before baking.
Are these cakes gluten-free?
As written, no—they use all-purpose flour. However, you can substitute with a gluten-free flour blend to accommodate gluten-free diets with good results.
Final Thoughts
I can’t recommend the Chocolate Lava Skull Cakes Recipe enough if you want a dessert that’s both playful and indulgent. It’s perfect for impressing friends or treating yourself to a rich chocolate moment with an adorable spooky flare. Give it a try—you might just discover your new favorite chocolate obsession!
Print
Chocolate Lava Skull Cakes Recipe
- Prep Time: 10 minutes
- Cook Time: 13 minutes
- Total Time: 23 minutes
- Yield: 6 cakes
- Category: Dessert
- Method: Baking
- Cuisine: American
Description
Delight in these decadent Chocolate Lava Skull Cakes, perfect for a spooky celebration or a rich dessert treat. Molten chocolate centers combined with a tender cake exterior create an indulgent experience that’s both visually striking and deliciously satisfying.
Ingredients
Chocolate Lava Skull Cakes
- 1 cup semi-sweet chocolate chips
- 10 Tbsp butter
- 3 whole eggs
- 3 egg yolks
- 1½ cups powdered sugar
- ½ cup all-purpose flour
Instructions
- Preheat and Prepare Pan: Preheat the oven to 450ºF. Generously grease the Skull Cake Pan with shortening and cooking spray, ensuring all the nooks and crannies are fully coated for easy cake removal.
- Melt Chocolate and Butter: In a saucepan over low heat, combine the semi-sweet chocolate chips and butter. Stir frequently until fully melted and smooth. Remove from heat and allow to cool slightly.
- Mix Eggs and Sugar: In a bowl, whisk together the whole eggs and egg yolks until combined. Beat in the powdered sugar until the mixture is smooth and slightly thickened.
- Combine Ingredients: Add the cooled chocolate and butter mixture to the egg and sugar mixture. Stir in the all-purpose flour, mixing well to form a smooth batter.
- Fill the Pan: Pour the batter evenly into the prepared skull cake pan, filling each mold carefully.
- Bake: Place the pan in the preheated oven and bake for 11 to 13 minutes. The edges should be firm while the center remains soft and molten.
- Cool and Remove: Remove the pan from the oven and let cool in the pan for 3 minutes. Then, invert the pan onto a parchment-lined baking rack and carefully lift the pan off to release the cakes.
- Serve: Serve the Chocolate Lava Skull Cakes warm, optionally garnished with whipped cream and/or vanilla ice cream for an extra indulgent finish.
Notes
- To ensure easy release, don’t skip greasing the pan generously with shortening and cooking spray.
- Watch the baking time closely; overbaking will result in less molten centers.
- Serving immediately after slight cooling preserves the lava texture inside.
- These cakes can be stored in an airtight container for up to 2 days and gently reheated if desired.
- Use good quality semi-sweet chocolate for the best flavor.

